Issuing a clearance
Use the flight-plan window to check and, when necessary, correct the clearance. Flight-plan data already received by Flight Strips is shown automatically; you only need to change fields that are wrong or incomplete.
-
Open the flight plan
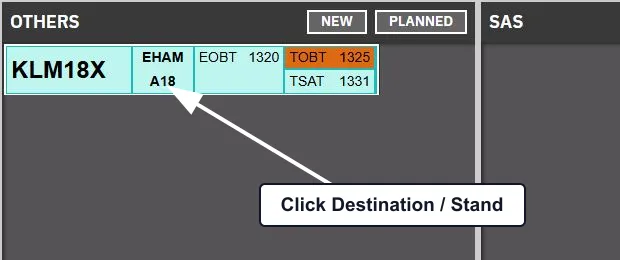
Find the flight in the uncleared bay, then click its Destination / Stand block. This opens the flight-plan window for that strip.
-
Read the automatically populated data
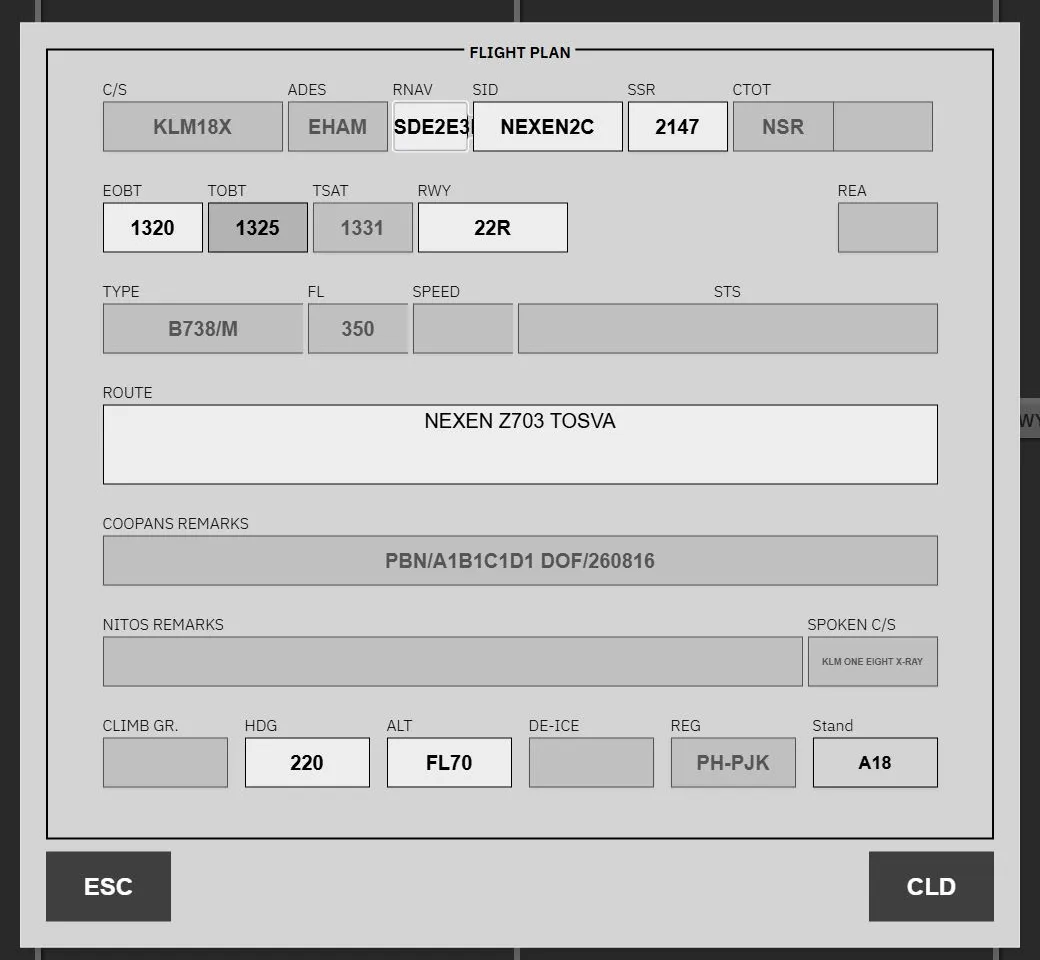
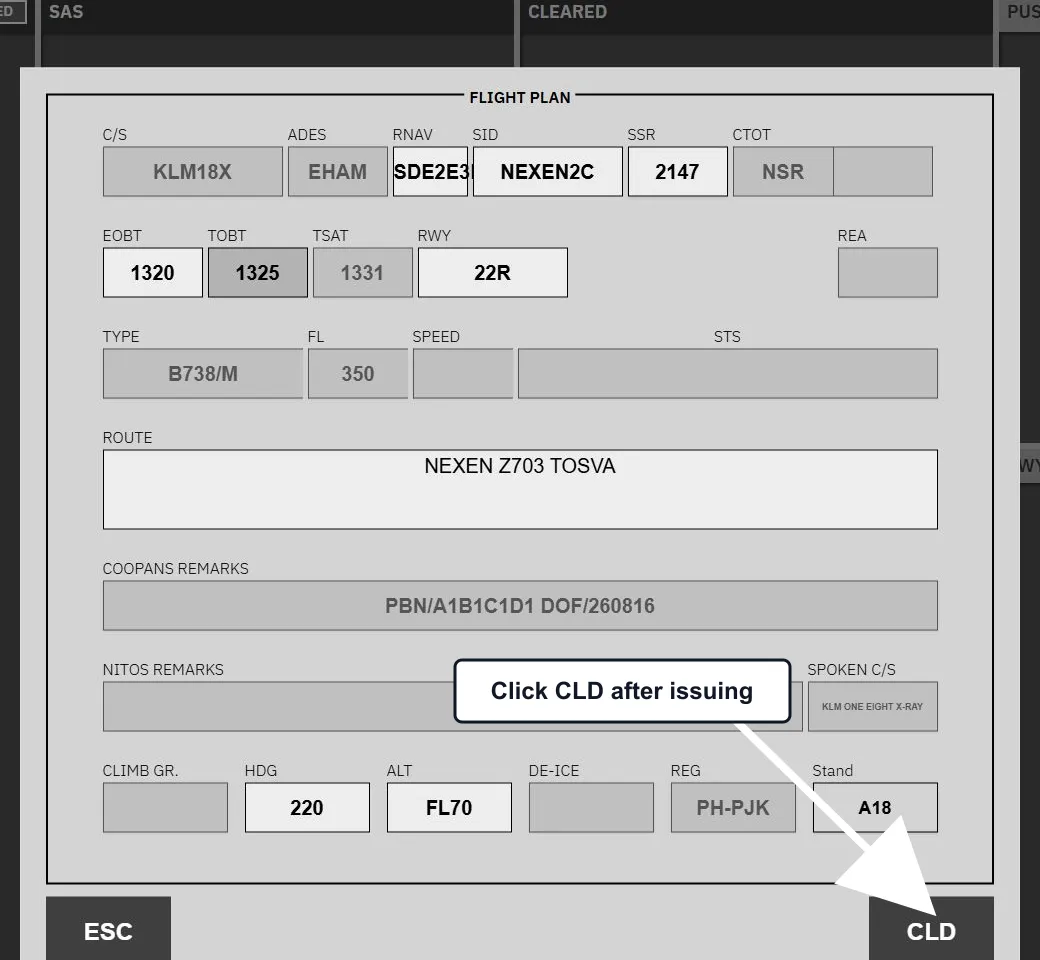
Start by checking the information that Flight Strips already displays. Callsign (C/S), destination (ADES), CTOT, TOBT, TSAT, aircraft type, requested flight level, remarks, spoken callsign, and registration are populated from the flight and are normally read-only.
The white controls are the fields you can act on: RNAV capability, SID, SSR, EOBT, runway, route, heading, initial altitude, and stand. Change a field only when the clearance requires it.
-
Assign the SID
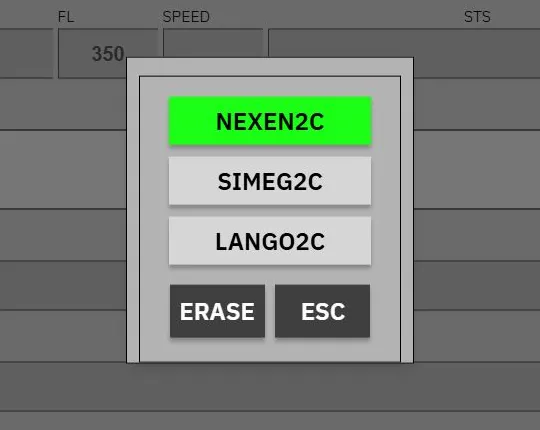
Click SID, then select the cleared SID. The list contains the SIDs available for the assigned runway; the current selection is green. ERASE clears the SID and ESC closes the selector without changing it.
-
Confirm the departure runway
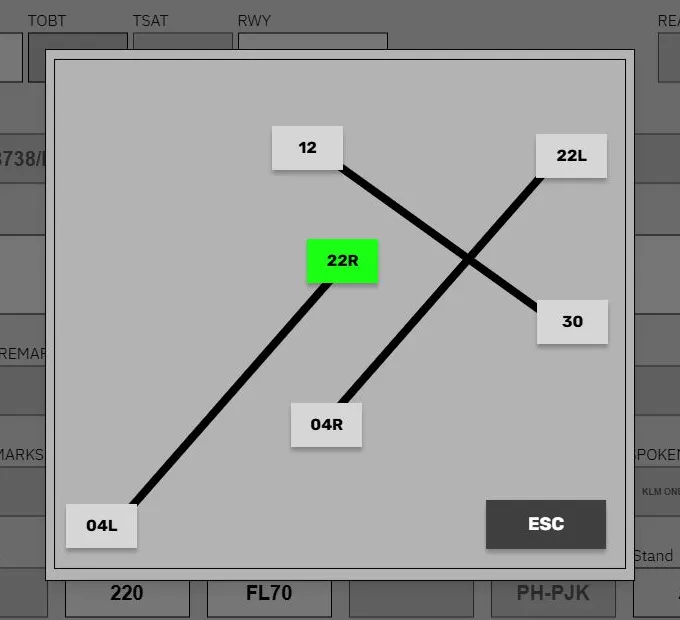
Click RWY and select the runway used for this departure. The selected runway is shown in green. Changing the runway updates the strip and changes which SIDs are offered in the SID selector.
-
Set the initial altitude and heading when required
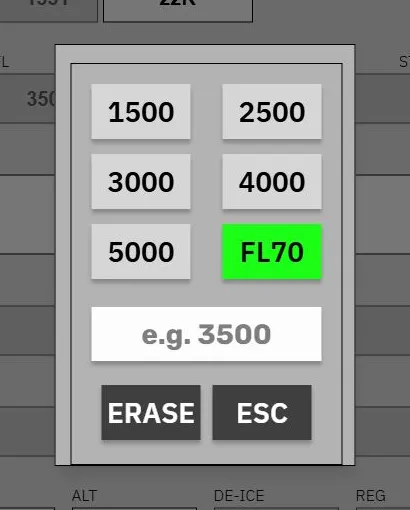
Click ALT to choose a preset altitude or enter another value. If you use ERASE, Flight Strips falls back to the configured initial altitude for the assigned runway; if no configured value exists, it keeps the current altitude. Altitudes above the transition altitude are displayed as flight levels.
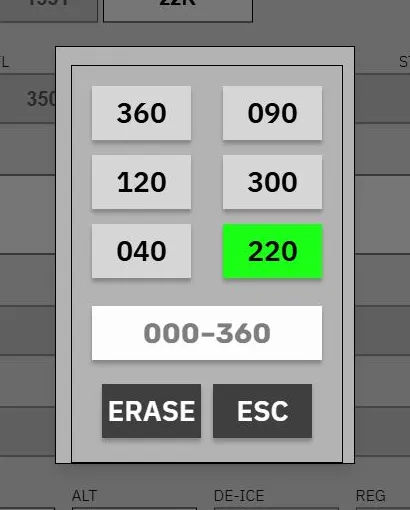
Click HDG to choose a preset heading or enter a heading from 000 to 360. Use ERASE when no heading is part of the clearance.
-
Check SSR, EOBT, and route
- Click SSR only when a new squawk is needed. Flight Strips requests a generated squawk and temporarily disables the button while it waits for the result.
- Edit EOBT when it is wrong, then press Enter or click away to save it.
- Edit ROUTE when the cleared route differs, then press Enter or click away to save it. If an ECFMP mandatory route applies, the route is shown in yellow and cannot be edited directly; Flight Strips asks you to confirm it when you click CLD.
-
Issue the clearance and click CLD
Read the clearance to the pilot. After the clearance has been issued, click CLD. For a voice clearance, Flight Strips moves the strip to CLEARED and closes the flight-plan window.
-
Verify the result
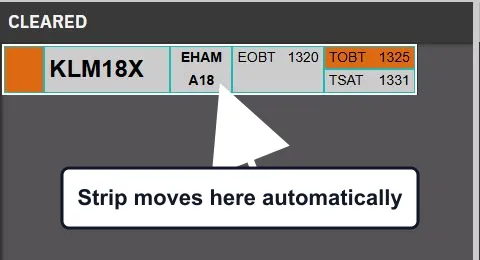
Confirm that the strip appears in CLEARED. You do not need to drag the strip there after using CLD.
When PDC or a mandatory route applies
Section titled “When PDC or a mandatory route applies”The CLD action follows the state of the strip:
- For a normal voice clearance, it moves the strip to CLEARED.
- For a requested PDC, it issues the PDC instead. REVERT TO VOICE is available while a PDC is requested, including a request with validation faults.
- For a manual-PDC configuration, Flight Strips asks for confirmation before issuing the PDC.
- When an ECFMP mandatory route applies, Flight Strips opens a confirmation dialog. For a voice clearance, confirming can update the SID and route, send the mandatory route to the pilot in a private message, and move the strip to CLEARED.